
.jpg?width=1490&name=rock-waterfall-slide-pool%20(1).jpg "rock-waterfall-slide-pool (1).jpg")
—Tips and guidelines for smart filter “housekeeping” to help ensure efficient filtration
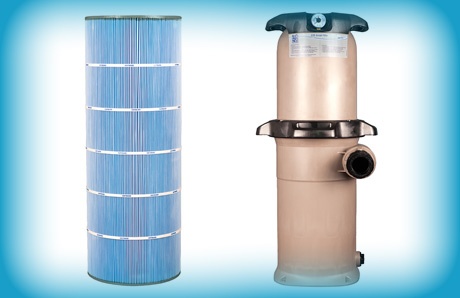
Keeping your swimming pool water looking and feeling good requires regular cleaning of your pool filter. Fortunately, for those with a cartridge-type filter system, maintaining the elements—the tubes of folded, accordion-like material that goes inside the filter tank—is easy to do.
Clean a pool cartridge filter: step by step
The role of your pool filter is to capture small pieces of debris floating in pool water and screen them out. Over time, dirt builds up in the cartridge elements, and it needs to be cleared out.
First, determine if your filter needs to be cleaned. When the filter gauge shows that the PSI (pounds per square inch) is more than 8 to 10 PSI higher than what’s normal for your filter, it’s time for some housekeeping.
Hint: You can check your owner’s manual for the correct PSI range, but the best approach is to know what’s “normal” for your pool when operating with its specific features and equipment configuration. To obtain this baseline, check the PSI when the cartridge is brand new or right after you have performed a deep cleaning on it. (described below in section 6).
To clean your cartridges, follow the simple steps outlined here. Also included are some tips for avoiding pitfalls and making the job as easy as possible.
1. Turn off the system.
Rule #1 is to never work on pool equipment while it’s running. So, always start by making sure the pump is turned off.
Next, bleed the filter tank of air by turning the air relief valve to the open position. Never attempt to open the filter tank while there is still pressure in the system; doing so could damage the filter—or worse, cause a personal injury!
2. Open the filter tank.Next, remove the clamp that secures the lid on the tank. Most modern filter tanks use an O-ring to hold the top and bottom pieces together. O-rings are easily removed by pressing up on the release tabs and turning counter-clockwise.
If you have an older model of filter, it may have metal clamps that are attached with screws. If you’re not sure how to remove it, check your owner’s manual or contact your local pool service company.
Hint: If you can’t find your owner’s manual, the manufacturer’s website will likely have a downloadable version.
3. Remove the cartridge(s) from the tank.
Once you have the clamp off, carefully pull the top section off your filter tank. Depending on the make and model of filter, it may contain a single large cartridge element or up to four smaller ones. Remove all of them, and set them aside to be cleaned.
Most units with one large cartridge will lift right out of the tank without unfastening any attachments. Smaller filters may have elements with attachments that hold them in place. Refer to the owner’s manual for instructions on removal.
4. Check cartridges for wear and tear.
With regular cleaning, a good quality pool cartridge filters should last three to five years before needing replacement. Ultimately, your pool’s use and backyard conditions will also impact your filter’s lifespan.
Each time you perform a cartridge cleaning, it’s a good idea to do a quick visual check for cracks in the plastic housing, tears in the pleats, or other signs of damage.
Even small tears can reduce the cartridge’s ability to filter the water. Therefore, replacing a damaged one is recommended so your filter achieves optimal performance.
5. Remove debris from the cartridge material.
The most common approach for cartridge cleaning is to use water—a hard spray from a garden hose. In a few minutes, the water will rinse away debris from between the folded cartridge pleats.
Begin at the top of the cartridge, and work your way toward the bottom. After rinsing the entire cartridge, turn it upside down and repeat the process.
If you have a small pool, small cartridge, and strong hands—and if your cartridge isn’t too dirty—you might be able to create a hard enough spray by holding your thumb over the end of the hose. However, in most cases you will want a nozzle attachment that can produce a water stream that’s strong enough for a thorough washing.
If you find that a regular hose nozzle fails to remove all the debris, try a high-pressure model that’s designed for household projects like washing cards. You can find these types of products at hardware stores or online.
Want to save water? Some pool owners like to remove dirt from the cartridge material with an air compressor. These devices produce concentrated a concentrated stream of air and they are available in portable models for household tasks like inflating tires.
Hint: Learn how to choose an air compressor model for your needs here. If you are using a high-power system, keep the air to a moderate flow—under 20 - 30 PSI—so it won’t damage the cartridge material. (If you are unsure, look at how hard the air is blowing; it should not be so forceful that it creates deep depressions in individual material folds.)
Even if the air does not remove all of the dirt, it will give your spray hose a head start; less water will be needed overall to finish the job.
Other tactics for removing stubborn debris and reducing water use
If clearing out all of the debris from the pleats is difficult using only water, an air compressor, or the two in tandem, other methods might be warranted. One is to augment the cleaning with a gentle brush or device designed for dislodging dirt from cartridge filters.
A word of caution: Since brushing can wear down cartridge material, do so sparingly. Brush only in the tough spots where dirt is caught deep in the folds and use the softest touch that accomplishes the task.
Another dirt-busting strategy is to allow the cartridge—and clingy dirt—to completely dry out prior to cleaning. Some pool owners find that dry debris comes off more easily with a few shakes of the material. The same dry-out process can be used for routine cleaning to save water; with much of the dry dirt shaken off, a shorter rinsing is needed to finish off the remaining dirt.
Typically, this “dry” approach requires keeping a second set of cartridges on hand. While set A is drying out, use set B inside your tank. Alternate at each cleaning. (Like keeping extra lightbulbs on hand in home, you might find having a backup set of cartridges is convenient—you’ll be ready whenever it’s time to replace them.)
If you opt for dry method, you can allow the cartridges outside in your backyard. But don’t keep them in sunlight for an extended period. A few hour is okay (and even beneficial as ultraviolet rays help kill any algae on filter material). However, overexposure to UV radiation can deteriorate the material and its housing.
A word of caution: If your pool water is not properly maintained and / or calcium levels in your local water are particularly high, this dry-out method may create problems: When water with high calcium levels (as well as other minerals like copper or manganese) evaporates from the cartridge material, the mineral content is left behind on the material, possibly embedding into the fibers. (See more below on mineral deposits and removing them.)
6. Degrease or deep clean the cartridge.
Hosing and the other methods described above will remove large debris from the cartridge. However, these strategies are not always enough to handle stickier substances like algae, sweat, sunscreen, and body oils that seep into the cartridge material—and interfere with its efficiency.
If your pool and spa get a lot of use with swimmer’s bringing in these kinds of “bather wastes” (as they are known), it’s a good practice to periodically perform a deeper cleaning. This extra step will provide a more thorough removal of dirt and debris and help maintain the filter’s effectiveness.
The most common way to achieve good results is with a commercial pool degreaser or cartridge cleaner (some brands combine both into a single product). These are available at hardware stores, pool supply stores, and online.
To use, spray the product directly onto the cartridge. Be sure to cover all of the surface areas between the pleats. Leave the compound on for the recommended amount of time. Then, thoroughly rinse it off with a hose. If the buildup on the cartridges is particularly dense and nasty, consider soaking them overnight.
There is no hard-and-fast rule here regarding frequency. Some pool owners deep clean every other time—which may mean only once per year when pool and spa use is high. Others will examine the filter materials to see if material seems sticky or coated, and only if it is, will they use a degreaser.
Tip: If you are willing to the extra mile for enhancing every bit of filter’s effectiveness and lifespan, consider using a degreaser each time you clean the cartridge. Doing so takes some effort and there is a cost to the product. However, it will clear the materials more thoroughly, and the more clear and permeable the material remains, the better it can new dirt and help keep water sparkling clear.
Special process for mineral removal
If your pool water contains high amounts of calcium, deposits may form on the filter materials. This issue tends to be limited to certain municipalities around the country with “hard water”. These deposits look like the rough, white blemishes you see on surfaces like rock and pool tile.
By clogging up some of the space between the fiber filaments, the permeability of the material—water’s ability to pass through it—is compromised. As with a dirty filter, the mineral-heavy material works less efficiently.
To address this issue, you can use a product that you likely have on hand for pool water maintenance: muriatic acid. Unless your owner’s manual advises against doing so, this chemical—in a diluted form—can be used attack the hard built up.
In a bucket or large trash can, make a mixture of one part muriatic acid and 30 parts water. For safety, be sure to add the acid to the water—NOT the water to the acid! In addition, wear appropriate protective gear.
When you place the cartridge into the acid bath, there may be some fizzing. This is the calcium reacting with the acid (and with any organic matter such as body oils). The reaction may continue for a few minutes. When it stops, you can let the cartridge soak another 10 to 15 minutes, then it’s time to thoroughly rinse the cartridge with a hose.
A word of warning: Some pool owners regularly use muriatic acid for routine cartridge maintenance, but some experts advise against doing so except in special cases for calcium removal. The reason: If there are sticky bather wastes in the cartridge, the acid can actually lock any oils into the material, clogging it up.
7. Reassemble the filter tank.
Once your cartridges are clean, return them to the inside of the filter tank. Reassemble any attachments if necessary. Set the top portion of the filter tank firmly back in place, and tightly close the O-ring (or other clamping mechanism).
Turn the air release valve back to the closed position. Turn on the pump to make sure everything is functioning properly.
Hint: Applying a small amount of a silicon-based lubricant to the O-ring will help extend its serviceable life.
8. Test the filter’s air pressure.
With the pump running, open the filter’s air relief valve to release any excess air in the system. When water consistently sprays out of the valve, there is no more air in the system. Check the filter pressure to make sure it’s falling within the proper range for your filter when it’s clean.
Additional cartridge maintenance tips
To obtain the best possible performance and longest life out of your pool filter cartridges:
Do:
• Read your filter owner’s manual, and clean filter elements according to the instructions specific to your brand and model.
• Regularly check your pool water chemistry, and keep it properly balanced at all times.
• Clean cartridges only when it’s truly necessary—when the pressure is 8 to 10 PSI higher than what’s normal for your filter.
• Minimize the formation of organic build up on your cartridges with an antimicrobial pool filter. If your cartridges are not made with Microban®, consider ones with this product protection when it’s time to purchase replacements. The compound inhibits microorganisms from multiplying into a slimy film on cartridge material.
Don’t:
• Use a stiff brush to clean the pleats, as this can damage them. Use a soft-bristle one or other device that’s made for gently lifting off debris caught in between the folds of material.
• Over rely on brushing. The single biggest enemy of cartridge wear is brushing the material. Even a specialty tool for cartridge cleaning breaks down the material slightly each time its bristles or parts hit the fabric.
Properly caring for your pool filter cartridges as indicated can save you money in the long run. Above all, well-maintained filter cartridges will help keep your pool water looking too good to resist.